Imagine if you will an exquisite Georgian bureau – think about its colour, the dinks and the scratches all of which tell a thousand stories about its past, how it’s been used and how it’s been treated. The intrinsic value of the piece is in its character.
If you owned such a piece of furniture you would preserve it, treat it with the utmost care and restore it sympathetically, likely with the help of an expert. The one thing you would probably not do is take a sanding machine to it. And yet, that is what often happens to period wooden floors; sadly the first instinct of people when faced with dirty, marked wooden floorboards is to sand them, removing layers of paint, varnish and wax quickly and, in the process, also destroying all traces of the floor’s history and character.
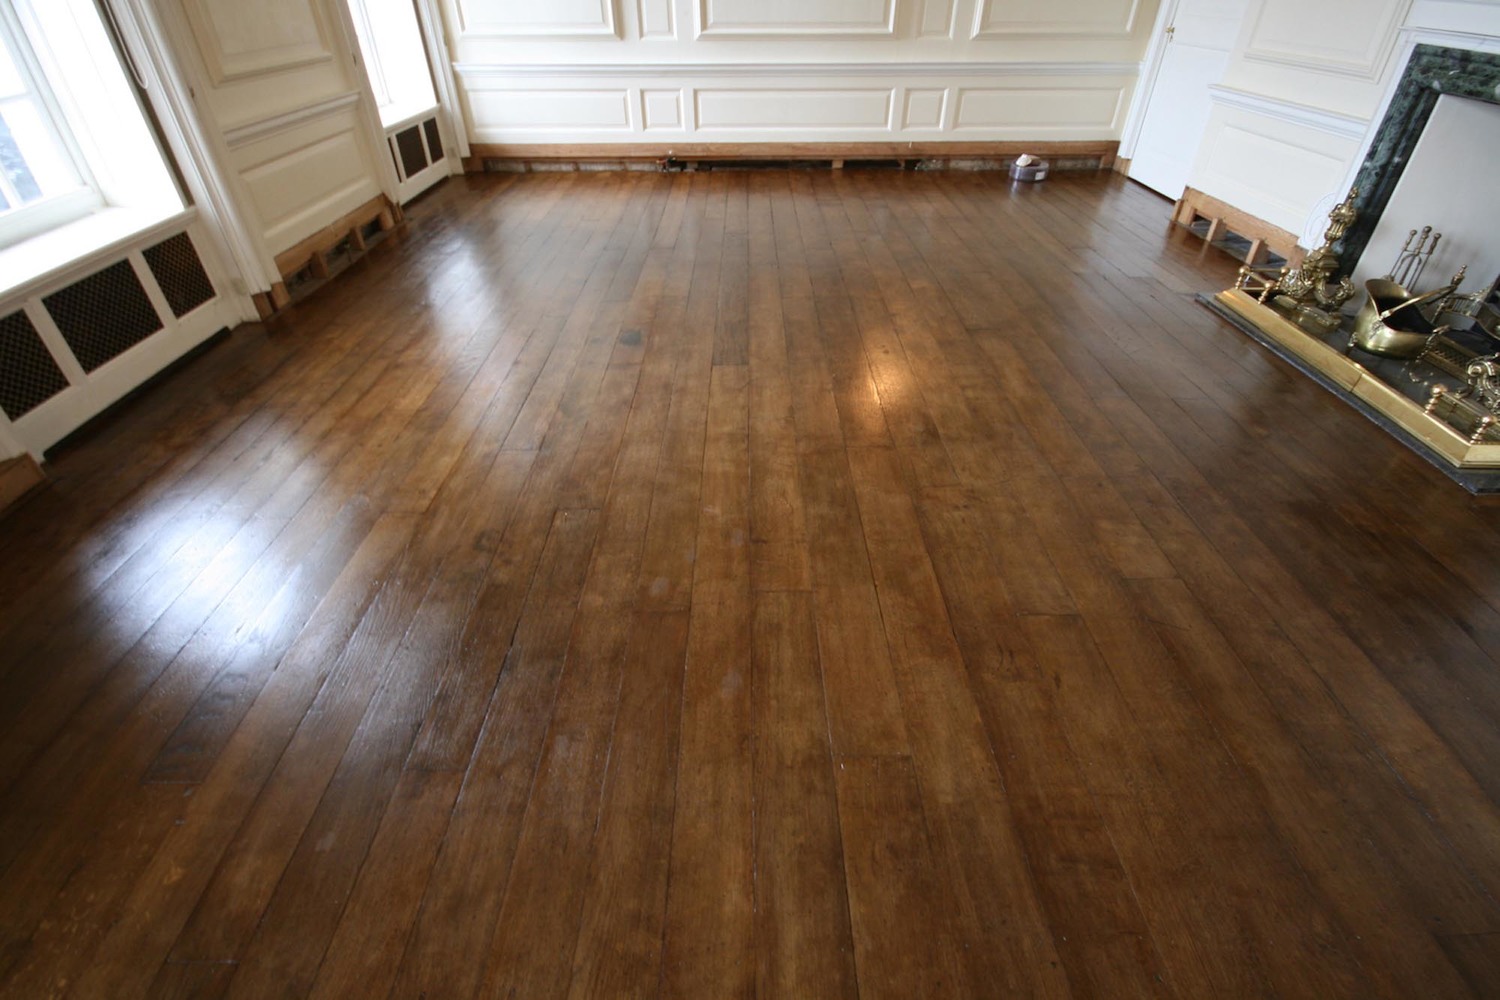
I am passionate about changing the way people treat the restoration of period wooden floors. I approach the restoration of historic wooden flooring the same as you would a piece of antique furniture to preserve every undulation and character mark, and therefore maintain an important part of a building’s history.
I have been exceptionally fortunate to have worked on the restoration of beautiful wooden flooring in some of the country’s most prestigious historic buildings – see here for examples of some of my favourites.
It really is not at all necessary to sand wood, whatever state of (dis)repair it is in. I’m often asked if there is anything I wouldn’t tackle and the simple answer is “no, there isn’t”. There is nothing that can’t be conserved, restored or replaced using non-aggressive traditional methods.
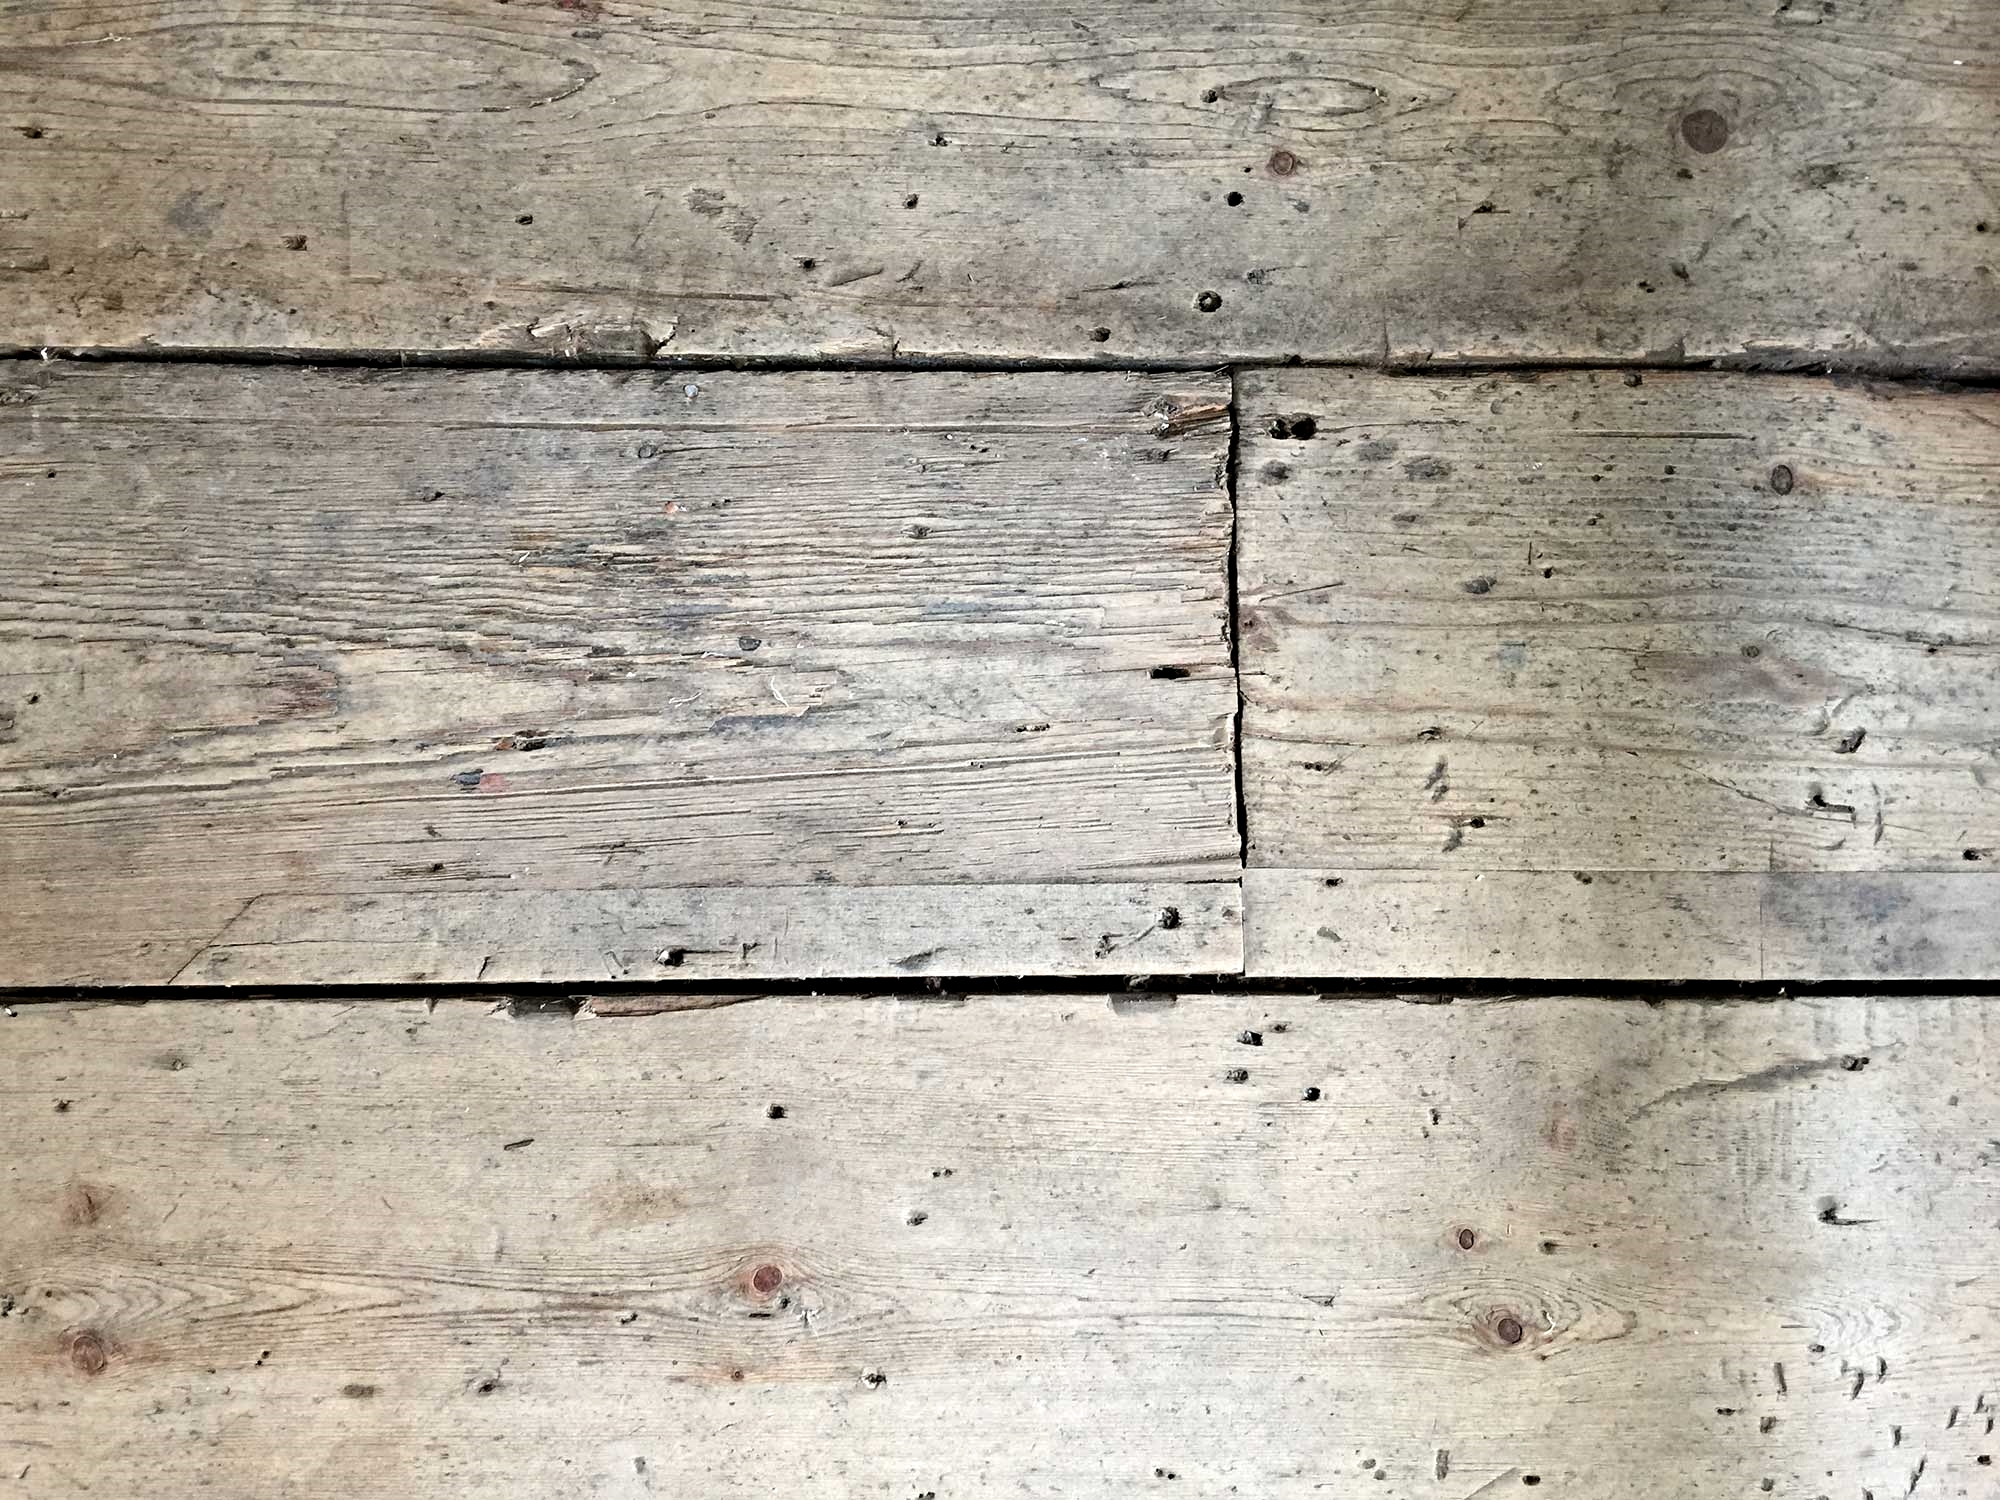
The restoration process is a painstaking but very important one. I work only by hand, using traditional tools and methods. Initially I decide whether any of the boards need to be replaced – typically a room will need a small percentage of replacement boards. I always use reclaimed wood, which has a good patina and has not been previously sanded, as a replacement. Finding wood that has never been sanded isn’t easy but it can be done and I always take the time to find the best patina for each floorboard I’m working on. When I can, I prefer to repair a board and this is possible if, say, it has only a few small cracks at one end.
The main part of the restoration is removing the existing finish – whether that’s paint, varnish or carpet adhesive. Each project requires its own sympathetic cleaning method, all of which rely on the use of hand tools to prevent any damage to the wood.
To begin, I gently remove the first layer, taking care of any carpet tacks or staples as I go. Once this top layer is removed, I repeat the process over and over again, one layer at a time, slowly slowly until I get to the bare wood. I then use a soft nylon abrasive to remove any residual remnants of the finish that may still be left on the floor.
I liken this part of my job to being an archaeologist working on a dig site. The work has to be done slowly, methodically and carefully so as not to cause any damage. If this is all done correctly, the bare wood should feel silky smooth to the touch whilst still displaying every dent and scratch.
You will always see a lot of reference to patina on my website and in my writing, and for me, retaining this is crucial. If you think of a 400 year old antique oak wooden armchair, with the ends of its arms worn down from the dozens of hands that have held onto them over the years, these are the marks that give the chair its character. It’s this type of wear that we refer to as patina and it is this, often caused by canes, shoes, instruments or machinery that I seek to preserve in the wooden floors I restore.
After the floor is properly cleaned, I apply stain, wax or acrylic floor lacquer according to the client’s specification. Every finish I apply is reversible, the golden rule of any conservation or restoration project. For example, I never use man-made glue as it can’t be removed; instead I use animal glue which is easily removed with hot water.
Of course, some projects are more complex than others. Sometimes I work on projects where all the floorboards have shrunk, leaving gaps between each one of them. This often occurs because the wooden boards were laid before buildings had central heating, when houses were damper and had a higher moisture content. Central heating removes a lot of moisture from the air and this drier atmosphere impacts on the boards, causing them to shrink. Once moisture levels have settled, however, and the heating system is retained, there should be no further shrinkage.
One way of dealing with the problem of shrunken boards is to put fillets in between the gaps. This is, however, only a short-term fix as, over time, these tend to pop out as the wood expands and contracts. How I address the problem, whilst time-consuming, is a long-term fix. I re-lay the floor by taking up each board and pushing it to one side thereby reducing the size of the individual gaps. Once each original board is re-laid, the room has one large-ish gap down one side, which I then re-fit using reclaimed wooden boards.
The restoration of wooden flooring is one of the favourite parts of my job. Each floor represents a time capsule, a piece of history, that helps us to unlock the secrets of a bygone age.